How to Connect an Electricity Meter Safely
Understanding Electricity Meter Basics
So, you’ve decided to embark on a journey to learn about electricity meters and how to connect one? That’s great! Electricity meters are crucial pieces of equipment that help you measure and monitor your energy consumption. Let’s dive in and take a closer look at the different types of meters and how they function.
Types of Electricity Meters
When it comes to electricity meters, you’ll find that there are three main types available: analog, digital, and smart meters. Each one has its own set of features and benefits.
Analog Meters
Analog meters, also known as electromechanical meters, are the classic type that many of us have grown up with. These meters have a rotating dial that records electricity usage. They rely on a small disc that spins as current flows through the meter. The speed of the disc is proportional to the amount of electricity used, and the readings are displayed on a series of dials.
Analog meters are known for their reliability and longevity, but they can be a bit tricky to read if you’re not used to interpreting the dials. Additionally, they’re gradually being phased out as newer technologies become more prevalent.
Digital Meters
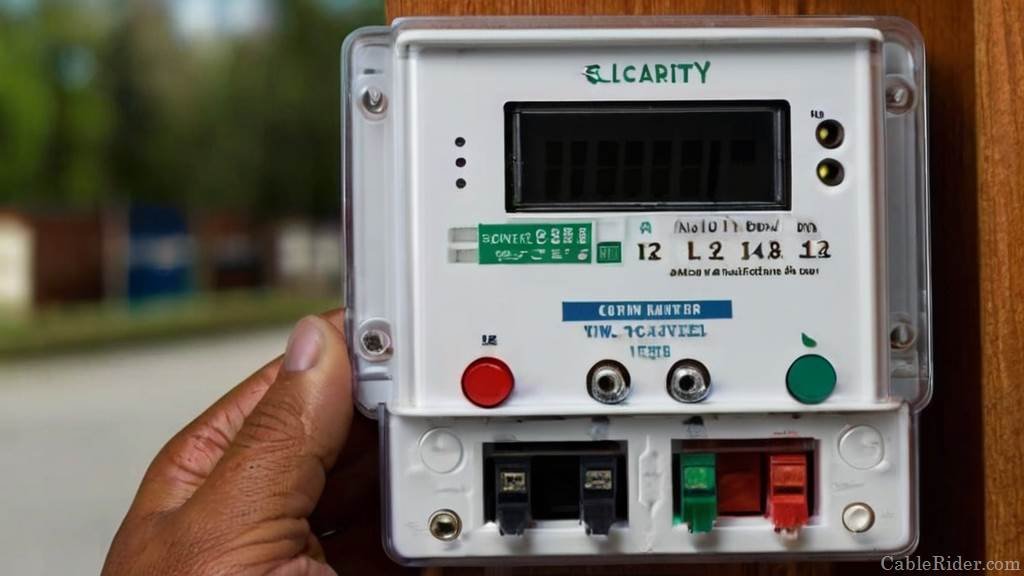
Digital meters are the next step up in terms of technology. Instead of dials, they use digital displays to show you exactly how much electricity you’re using. These meters provide more precise readings and are much easier to read at a glance. They also come with additional features such as tamper detection and higher accuracy.
Digital meters tend to be more user-friendly than analog meters and can be a good choice for those who want clear and easy-to-understand readings.
Smart Meters
Smart meters represent the cutting edge of electricity metering technology. These meters not only measure your electricity usage, but they can also communicate with your utility provider through wireless networks. This allows for real-time monitoring and reporting, as well as better load balancing on the power grid.
Smart meters offer a host of benefits, including remote meter readings, more accurate billing, and access to detailed usage data. If you’re looking for greater control over your energy consumption and more insights into your usage patterns, a smart meter might be the way to go.
Meter Components and Functions
Now that you know the different types of electricity meters, let’s take a look at their various components and how they function.
Meter Display and Readings
The display on your meter, whether it’s a set of dials or a digital screen, is where you get a direct look at your electricity consumption. For analog meters, this involves reading the dials in sequence to get an accurate measurement. For digital and smart meters, you can simply glance at the screen to see your current usage.
In addition to showing your current electricity usage, some meters may display additional information such as your total usage over a given period or error codes if there are any issues with the meter.
Meter Wiring and Terminals
The wiring and terminals of your electricity meter play a crucial role in connecting the meter to your home’s electrical system. Meters typically have input and output terminals for the incoming power and the distribution of electricity throughout your home.
When connecting a new meter, it’s important to follow the manufacturer’s instructions and any local electrical codes. Incorrect wiring can lead to dangerous situations, so be sure to take all necessary precautions. If you’re unsure about any aspect of the connection process, it’s always a good idea to consult a professional electrician.
By understanding the different types of electricity meters and their components, you’ll be well-prepared to connect a meter safely and efficiently. Remember to take your time and double-check your work to ensure everything is set up properly. Happy metering!
Preparing for Installation
When it comes to connecting an electricity meter, getting everything set up right is crucial. Not only does it help you avoid potential hazards, but it also ensures your meter functions as intended. Let’s talk about the necessary tools and safety measures you should consider before diving in.
Gathering Necessary Tools and Equipment
First off, let’s make sure you have everything you need for a smooth installation. Here’s a handy list to guide you:
-
Insulated screwdriver: You’ll want a good-quality, insulated screwdriver for handling electrical connections. This helps prevent shocks and keeps you safe.
-
Wire strippers: These are essential for stripping the insulation off wires for proper connections.
-
Pliers: A pair of pliers is useful for gripping and manipulating wires and terminals.
-
Multimeter: This tool helps you check for live wires and verify correct connections.
-
Protective gear: Safety goggles and gloves should be part of your kit to protect yourself from potential hazards.
Once you have all your tools ready, double-check the installation area for any obstructions. Make sure you have easy access to the meter and surrounding wiring.
Safety Precautions and Guidelines
Safety first! This should be your motto whenever you’re dealing with electricity. Here are some important guidelines to follow:
Shutting Off the Power
The very first thing you should do before starting any work is to turn off the power. Head to your main breaker panel and locate the circuit that feeds the meter. Switch it off to ensure there’s no live current running through the wires.
It’s a good idea to double-check that the power is off using your multimeter. This will confirm there’s no voltage present, giving you peace of mind before you proceed.
Using Proper Insulated Tools
When you’re working with electricity, using insulated tools is non-negotiable. These specialized tools have rubber or plastic coatings to protect you from electric shock.
Avoid using regular tools, as they lack the necessary insulation to keep you safe. Insulated tools also help prevent accidental short circuits or damage to the meter.
To sum it up, preparation and safety are key when installing an electricity meter. By gathering the right tools and following safety precautions, you can confidently tackle the installation process. And remember, when in doubt, don’t hesitate to call in a professional electrician for assistance. Stay safe and happy installing!
Connecting the Electricity Meter
Once you’ve gathered your tools and equipment and followed safety precautions, you’re ready to roll up your sleeves and connect the electricity meter. This part requires a steady hand and careful attention to detail. Let’s walk through the process step by step.
Understanding Connection Points
To start, let’s get familiar with the key connection points on the meter. This is where the magic happens and where you link your home’s electrical system with the incoming power source.
Main Input and Output
The main input and output terminals are the most critical connections you’ll be making. The input terminals are where the electricity flows in from the utility provider, while the output terminals are where the power goes out to your home. It’s essential to distinguish between these two to ensure proper connection and avoid potential hazards.
Pay close attention to the markings on the meter, as they will guide you on which terminals are input and output. Typically, the top set of terminals is the input, while the bottom set is the output.
Grounding Connections
Grounding connections are all about safety. The grounding terminal provides a path for excess current to flow safely into the ground in case of a fault. This helps protect both your electrical system and your home from potential damage.
Be sure to check the grounding terminal on your meter, as it may have specific instructions for proper connection. This step should not be overlooked, as grounding plays a crucial role in preventing electrical shocks and fires.
Step-by-Step Connection Process
Now that you understand the key connection points, let’s dive into the nitty-gritty of the process. Follow these steps carefully to ensure a successful and safe installation.
Connecting Input Wires
-
Identify the input terminals: Locate the input terminals on your meter. These are usually at the top of the meter and may be labeled as “L1” and “L2” or similar.
-
Strip the input wires: Use wire strippers to strip a small portion of insulation off the input wires.
-
Connect the input wires: Attach the input wires to the input terminals. Make sure they are tightly secured and that there’s no exposed wire.
-
Double-check the connections: Once the input wires are connected, double-check the terminals to ensure everything is secure and properly tightened.
Connecting Output Wires
-
Locate the output terminals: Find the output terminals on the meter. These are usually at the bottom and may be labeled similarly to the input terminals.
-
Prepare the output wires: Strip a small portion of insulation from the ends of the output wires.
-
Connect the output wires: Attach the output wires to the output terminals and tighten the connections.
-
Verify the connections: Give the wires a gentle tug to make sure they’re firmly in place.
Connecting Neutral and Ground
-
Locate the neutral and ground terminals: Check the meter for markings indicating the neutral and ground terminals.
-
Prepare the neutral and ground wires: Strip the ends of the neutral and ground wires for connection.
-
Connect the neutral wire: Attach the neutral wire to the neutral terminal and secure it firmly.
-
Connect the ground wire: Attach the ground wire to the grounding terminal. Ensure it is tight and properly connected.
After completing the connections, give the meter one last look to ensure everything is in place and secure. Double-checking your work can prevent problems down the road. Once you’re confident in the connections, you can proceed to restore power at the breaker panel.
Remember, if you run into any issues or are unsure about the process, it’s best to consult with a professional electrician. Safety should always be your top priority!
Verifying the Connection
Once you’ve connected your electricity meter, it’s time to verify the installation to ensure everything is working as it should. Testing the meter and electrical system is a crucial step that shouldn’t be skipped. Let’s walk through the process and what you need to do.
Testing the Meter and Electrical System
This is the moment of truth: time to put your installation to the test and see if everything is running smoothly. The last thing you want is a faulty connection or an electrical mishap. Here’s how to check your work.
Using a Multimeter
A multimeter is a handy tool that helps you measure voltage, current, and resistance in an electrical system. It’s your best friend when it comes to verifying your connections.
-
Set up your multimeter: First, set the multimeter to measure voltage. Look for the appropriate setting on your device.
-
Check the input and output terminals: Place the multimeter probes on the input and output terminals. You should see a voltage reading that matches your expected values.
-
Verify continuity: Switch your multimeter to continuity mode and test the connections. A continuous circuit will emit a beep, indicating that the circuit is complete.
If your readings are off or you don’t hear a beep, it may signal an issue with your installation. Double-check your connections and make adjustments as needed.
Checking for Voltage and Continuity
In addition to using your multimeter, there are other ways to check for voltage and continuity in your electrical system.
-
Test at the breaker panel: After reconnecting power at the breaker panel, use your multimeter to check the voltage at various points in your system. Make sure the readings match your utility’s specified voltage range.
-
Inspect for issues: Keep an eye out for any visible signs of trouble, such as frayed wires, loose connections, or burning smells. These could indicate a problem that needs immediate attention.
Ensuring Meter Functionality
After testing the electrical system, you want to ensure the meter itself is functioning properly. Let’s go over some ways to do that.
Observing Meter Readings
Now that the power is back on, take a look at your meter’s display. If it’s a digital meter, you should see readings for current usage and other pertinent data. Analog meters will have dials indicating your energy consumption.
-
Check initial readings: Jot down the initial readings when you first power up your system. This will give you a baseline to compare against later.
-
Monitor for changes: Over the next few hours or days, keep an eye on your meter readings. You should see a gradual increase in consumption as you use more electricity.
Checking for Abnormalities
While monitoring your meter, keep an eye out for any unusual behavior or readings. Some things to watch out for:
-
Sudden spikes in usage: If you notice a drastic jump in usage without a clear reason, it could indicate a problem.
-
Error messages or codes: Digital and smart meters may display error messages or codes if something isn’t right. Consult your meter’s manual or reach out to your utility provider for guidance.
By carefully verifying your installation, you can catch any issues early and ensure your electricity meter is set up for optimal performance. If you run into any difficulties, don’t hesitate to contact a professional for assistance. Happy metering!
Troubleshooting Common Connection Issues
Even with the best preparation and care, issues can crop up when you’re connecting an electricity meter. Understanding the most common problems and knowing how to troubleshoot them can save you time and frustration. Let’s dig into some frequent issues you might encounter and how to resolve them.
Incorrect Wiring and Misconnections
Incorrect wiring or misconnections can lead to all sorts of trouble, from inaccurate readings to potential safety hazards. It’s crucial to be mindful of these issues and address them promptly.
-
Crossed wires: Sometimes, wires may get crossed or mixed up during installation. This can lead to erratic meter readings or, worse, damage to your system. Check the meter’s terminal labels and make sure each wire is connected to the correct terminal.
-
Loose connections: Loose wires can cause intermittent issues or even power loss. Double-check all connections to make sure they’re tight and secure. Give each wire a gentle tug to ensure it’s firmly in place.
-
Improper grounding: An improper ground connection can pose serious safety risks. Verify that the grounding wire is connected to the appropriate terminal and that the connection is tight.
If you spot any of these issues, shut off the power and make the necessary adjustments. If the problem persists, don’t hesitate to call in a professional electrician.
Issues with Meter Display or Readings
Another area where you might run into trouble is the meter display or readings. Let’s cover some common problems and how to handle them.
Error Codes and Messages
Modern meters, especially digital and smart ones, may display error codes or messages when something’s not right. These codes can provide valuable clues about what’s going on.
-
Check the manual: If you see an error code, refer to your meter’s manual for guidance. The manual should explain what each code means and how to resolve it.
-
Contact your utility provider: If you’re unable to interpret the code or fix the issue yourself, reach out to your utility provider. They may be able to offer assistance or send someone to check the meter.
Remember, error codes are there to help you identify potential issues, so don’t ignore them!
Unusual Fluctuations
Fluctuations in your meter readings can signal a problem with your installation or electrical system. Here’s what to watch out for:
-
Sudden spikes in usage: If you notice abrupt changes in your meter readings that don’t match your usual patterns, something might be off. This could be due to crossed wires, a malfunctioning meter, or a problem with your electrical system.
-
Inconsistent readings: If your readings seem erratic, jump around, or don’t make sense, there may be a wiring or connection issue.
To troubleshoot these problems, double-check your wiring and connections. Make sure everything is secure and properly set up according to the meter’s manual. If the issue persists, it’s best to call in a professional to avoid any further complications.
Troubleshooting common connection issues is part of the process of working with electricity meters. By knowing what to look for and how to address potential problems, you can keep your meter running smoothly and safely.
Safety and Compliance Considerations
Connecting an electricity meter is not just about getting the wiring right, it’s also about ensuring you stay safe and comply with local regulations. Let’s explore the necessary safety and compliance measures and when it might be time to bring in the professionals.
Following Local Regulations and Codes
Different areas have their own set of rules and regulations regarding electrical work, including installing and connecting electricity meters. Staying on the right side of the law is not just a matter of following the rules, it’s about keeping your home and family safe.
-
Understand your local regulations: Before you start any work, check your local building codes and regulations. You may need permits or inspections at certain stages of your project.
-
Adhere to national standards: National Electrical Code (NEC) and other standards can offer guidance on best practices and safety measures. Familiarize yourself with these standards to ensure your work is up to par.
-
Contact your utility provider: Many utility providers offer specific guidance on installation and connection processes. Reach out to your provider for any necessary forms or requirements.
By following local and national regulations, you can avoid penalties, ensure your home’s safety, and maintain good standing with your utility provider.
Hiring a Professional Electrician
While you may feel confident in your ability to handle some aspects of connecting an electricity meter, there are times when calling in a professional electrician is the best choice. Let’s talk about when and how to choose a qualified electrician.
When to Seek Professional Help
There are a few instances where bringing in a professional is a good idea:
-
Lack of experience: If you’re new to electrical work or have never connected an electricity meter before, it’s best to let a professional handle it. The potential risks of incorrect installation far outweigh any cost savings from doing it yourself.
-
Complex setups: If you encounter complicated wiring setups or unexpected challenges during installation, a professional can provide expertise and ensure the job is done safely.
-
Inspection requirements: Some local codes require professional inspections or permits for meter installations. In these cases, hiring a licensed electrician is essential.
Choosing a Qualified Electrician
When it’s time to hire a professional, you want to make sure you’re getting someone who knows what they’re doing. Here are some tips for choosing a qualified electrician:
-
Check for licensing and certification: A reputable electrician will have the proper licensing and certifications required by your state or region.
-
Ask for references: Don’t hesitate to ask for references from previous clients. This can give you an idea of the electrician’s track record and work quality.
-
Get multiple quotes: Shop around and get quotes from a few different electricians. This can help you find a fair price and a good fit for your project.
-
Ask about experience: Inquire about their experience with meter installations and similar projects. More experience often translates to better results.
Hiring a professional electrician can give you peace of mind, knowing that the job will be done safely and in compliance with all regulations. Sometimes, it’s worth investing in expertise to ensure your home stays safe and your electrical system runs smoothly.
Maintenance and Upkeep of the Electricity Meter
Once your electricity meter is up and running, you want to make sure it stays that way for the long haul. Regular maintenance and upkeep are key to keeping your meter in tip-top shape and ensuring your electrical system runs smoothly. Let’s dive into the steps you can take.
Regular Meter Inspections
Routine checks on your meter can help catch potential issues before they become bigger problems. Plus, keeping your meter clean and damage-free can prolong its life.
Cleaning the Meter Area
Keeping the meter area clean is a straightforward but important task. Dirt, debris, and even vegetation can interfere with the meter’s function, so it’s essential to keep things tidy.
-
Clear debris: Remove any leaves, dirt, or other debris from around the meter. This includes keeping plants and shrubs trimmed back from the area.
-
Wipe down the meter: Use a damp cloth to gently wipe down the meter, being careful not to disturb any wires or connections.
-
Check for pests: Keep an eye out for pests such as insects or rodents, which can cause damage if they get too close to the meter.
By maintaining a clean and clear area around your meter, you can prevent unnecessary issues and improve its lifespan.
Checking for Physical Damage
Inspecting your meter for physical damage is another crucial aspect of maintenance. Any cracks, dents, or other signs of wear can impact the meter’s performance.
-
Visual inspection: Take a moment to look at the meter and its enclosure. Check for any signs of damage, such as cracks in the plastic cover or loose wires.
-
Look for corrosion: Corrosion around the terminals or connections can affect the meter’s function. If you see any, contact your utility provider or a professional electrician.
-
Monitor the meter’s condition: Keeping track of the meter’s physical state over time can help you spot potential issues early.
If you find any significant damage, it’s best to contact your utility provider or a professional to assess the situation.
Updating or Replacing Meters
Sometimes, maintenance goes beyond just cleaning and checking for damage. Updating or replacing your meter when necessary can keep your electrical system efficient and up to date.
Upgrading to Smart Meters
Smart meters are the latest innovation in electricity metering, offering a range of benefits over traditional meters.
-
Real-time data: Smart meters provide real-time data on your energy usage, helping you monitor consumption and make informed decisions.
-
Remote monitoring: Your utility provider can read smart meters remotely, eliminating the need for in-person meter readings.
-
Energy-saving opportunities: Smart meters can offer insights into your energy usage patterns, helping you find ways to save energy and reduce costs.
Upgrading to a smart meter can be a wise choice for many homeowners, offering convenience and potential savings.
Scheduling Periodic Replacements
All meters have a limited lifespan, so replacing them periodically is part of good maintenance practice.
-
Check the age of your meter: If your meter is reaching the end of its expected lifespan (typically around 20 years), consider scheduling a replacement.
-
Consult your utility provider: Your utility provider may have recommendations for when to replace your meter or upgrade to a newer model.
-
Keep an eye on performance: If you notice a decline in your meter’s performance, such as inaccurate readings, it might be time for a replacement.
By staying proactive with periodic replacements, you can ensure your electrical system remains reliable and efficient.
Maintenance and upkeep of your electricity meter are essential for keeping your home safe and your electrical system running smoothly. With regular inspections and timely updates, you can enjoy reliable service for years to come.

