How to Connect a Heating Cable: Expert Tips
Understanding Heating Cable Connections
Importance of Proper Connection
Connecting heating cables might seem like a straightforward task, but the importance of doing it correctly cannot be overstated. Proper connection ensures not only the efficient operation of the heating system but also safety and longevity. A faulty connection can lead to various issues, including electrical hazards, inefficient heating, and even system failure.
Contents
ToggleTypes of Heating Cables and Their Applications
Heating cables come in various types, each designed for specific applications. Understanding these types is crucial for selecting the right cable and ensuring proper connection:
-
Self-regulating Heating Cables: These cables adjust their heat output based on the surrounding temperature. They are ideal for freeze protection, temperature maintenance, and roof and gutter de-icing.
-
Constant Wattage Heating Cables: These cables provide a consistent amount of heat regardless of the temperature. They are commonly used for pipe freeze protection and process temperature maintenance.
-
Mineral Insulated Heating Cables: Made of a copper conductor enclosed in magnesium oxide insulation, these cables are highly durable and suitable for high-temperature applications such as industrial processes and heat tracing.
-
Series Resistance Heating Cables: These cables consist of a conductive core surrounded by insulation and an outer metallic sheath. They are often used for floor heating systems and concrete curing.
Each type has its own set of advantages and is suited to specific environments and requirements.
Now, let’s delve deeper into the significance of ensuring a proper connection when installing heating cables.
When connecting heating cables, it’s essential to follow the manufacturer’s guidelines and recommendations. This includes using compatible connectors and ensuring proper insulation to prevent electrical hazards.
Proper connection not only ensures the efficient operation of the heating system but also extends its lifespan. A secure connection minimizes the risk of cable damage and ensures consistent heat distribution, thereby optimizing energy efficiency.
Conclusion
In conclusion, understanding the importance of proper heating cable connections and the different types available is crucial for successful installation and operation. By following the manufacturer’s guidelines and selecting the right cable for the application, you can ensure both safety and efficiency in your heating system.
Essential Tools and Materials
List of Tools Needed
When it comes to connecting heating cables, having the right tools on hand is essential for a successful installation. Here’s a comprehensive list of tools you’ll need:
-
Wire Strippers: These are used to remove the insulation from the ends of the heating cable to expose the conductors for connection.
-
Crimp Tool: A crimp tool is necessary for securely attaching connectors to the ends of the heating cable.
-
Heat Gun or Torch: Depending on the type of connectors used, a heat gun or torch may be required to shrink heat-shrink tubing or solder connectors.
-
Electrical Tape: Electrical tape is used to provide additional insulation and secure connections.
-
Multimeter: A multimeter is essential for testing continuity and ensuring proper electrical connections.
-
Screwdrivers: Flathead and Phillips screwdrivers may be needed to secure cable clamps or access terminal boxes.
-
Utility Knife: A utility knife comes in handy for cutting and stripping cable insulation with precision.
-
Safety Equipment: Safety goggles and gloves are crucial for protecting your eyes and hands during installation.
Types of Heating Cable Connectors and Accessories
Choosing the right connectors and accessories is vital for ensuring a secure and reliable connection for your heating cable. Here are some common types:
-
Cold Applied Splice Kits: These kits contain everything you need to create a watertight and durable splice in the heating cable, including heat-shrink tubing and crimp connectors.
-
Heat Shrink Connectors: Heat shrink connectors provide a waterproof seal and strain relief when properly installed. They are available in various sizes to accommodate different cable diameters.
-
Crimp Connectors: Crimp connectors are used to secure the heating cable to terminal blocks or junction boxes. They come in different styles, including butt connectors, ring terminals, and spade connectors.
-
Junction Boxes: Junction boxes provide a safe and accessible enclosure for making electrical connections. They are available in various sizes and materials, including plastic and metal.
-
Mounting Hardware: Depending on the installation location, you may need mounting hardware such as cable clamps, brackets, or adhesive clips to secure the heating cable in place.
-
Thermostats and Temperature Sensors: For temperature-controlled heating systems, thermostats and temperature sensors are essential accessories for regulating heat output and maintaining desired temperatures.
-
Insulation Materials: Insulation materials such as foam pipe insulation or heat-resistant tape may be necessary to protect the heating cable and improve energy efficiency.
By ensuring you have the right tools and materials on hand, you can tackle your heating cable installation with confidence and ensure a safe and reliable connection for years to come.
Preparing for the Connection
Safety Precautions
Before diving into connecting your heating cable, it’s crucial to prioritize safety above all else. Here are some essential safety precautions to keep in mind:
-
Turn Off Power: Always ensure that the power to the area where you’ll be working is switched off at the circuit breaker. This helps prevent electrical shocks and accidents.
-
Use Personal Protective Equipment: Wear safety goggles and gloves to protect your eyes and hands from potential hazards during the installation process.
-
Inspect the Cable: Before handling the heating cable, inspect it for any signs of damage, such as cuts, nicks, or exposed wires. If you notice any issues, do not proceed with the installation and replace the cable.
-
Work in a Well-Ventilated Area: If you’re working indoors, ensure proper ventilation to prevent the buildup of fumes from heat guns or soldering equipment.
-
Follow Manufacturer’s Instructions: Always adhere to the manufacturer’s guidelines and instructions for installing the heating cable to ensure safe and proper installation.
Assessing Installation Area and Cable Length Requirements
Before connecting the heating cable, it’s essential to assess the installation area and determine the cable length requirements. Here’s how to do it:
-
Measure the Area: Start by measuring the length of the pipe or surface where the heating cable will be installed. Be sure to account for any twists, turns, or obstacles along the way.
-
Consider Voltage Drop: Depending on the length of the cable run and the power requirements of the heating system, voltage drop may occur. Consult with an electrician to ensure proper sizing and voltage calculations.
-
Account for Thermostat Placement: If your heating system includes a thermostat or temperature sensor, consider its placement when determining cable length. You’ll need to run the cable to the location of the thermostat for accurate temperature control.
-
Plan Cable Routing: Once you’ve determined the length requirements, plan the routing of the cable, ensuring it follows the contours of the surface and avoids any sharp bends or kinks.
-
Check Environmental Conditions: Consider environmental factors such as temperature extremes, exposure to moisture or chemicals, and physical impact when selecting the type of heating cable and planning the installation.
By taking these safety precautions and carefully assessing the installation area and cable length requirements, you can ensure a smooth and successful connection of your heating cable system. Remember, safety should always come first when working with electricity and heating systems.
Step-by-Step Guide to Connecting Heating Cables
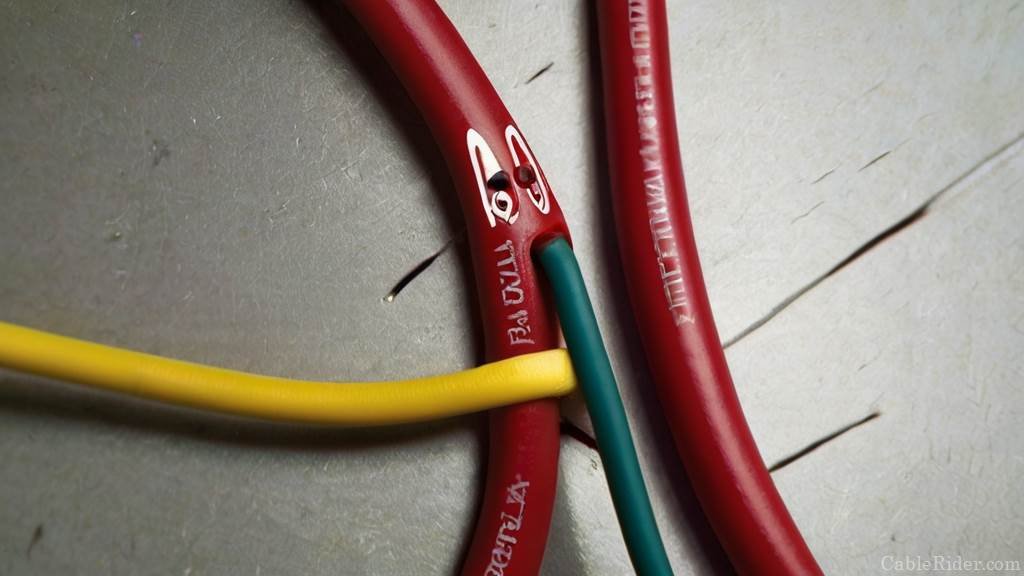
Cable Preparation and Stripping
Connecting heating cables requires careful preparation to ensure a secure and reliable connection. Follow these steps for cable preparation and stripping:
-
Gather Your Tools: Before you begin, make sure you have the necessary tools on hand, including wire strippers, a utility knife, and electrical tape.
-
Inspect the Cable: Start by inspecting the heating cable for any signs of damage or wear. Look for cuts, nicks, or exposed wires that could compromise the integrity of the connection.
-
Measure and Cut: Determine the length of cable needed for your installation and cut the cable to size using a pair of wire cutters. Be precise in your measurements to avoid excess cable.
-
Strip the Insulation: Using wire strippers, carefully strip away a small portion of the outer insulation from the ends of the cable to expose the conductors underneath. Take care not to damage the conductors during this process.
-
Trim Excess Strands: Once the insulation is stripped, inspect the exposed conductors and trim any excess strands to ensure a clean and uniform connection.
-
Twist the Strands: To prevent fraying and ensure a solid connection, twist the strands of each conductor together gently using your fingers.
-
Apply Insulation: After twisting the strands, wrap each exposed conductor with electrical tape to provide an additional layer of insulation and protection.
Connector Installation Techniques
Once the cable is prepared, it’s time to install the connectors for a secure connection. Here’s how to do it:
-
Select the Right Connectors: Choose connectors that are compatible with your heating cable and application. Common types include crimp connectors, heat shrink connectors, and terminal blocks.
-
Prepare the Connectors: If using crimp connectors, insert the stripped end of the cable into the connector barrel and crimp it securely using a crimping tool. For heat shrink connectors, slide the connector over the exposed conductor and apply heat to shrink the tubing and create a waterproof seal.
-
Secure the Connection: Once the connectors are attached, use electrical tape or heat shrink tubing to secure the connection and provide additional insulation.
-
Test Continuity: Before energizing the heating cable, use a multimeter to test continuity and ensure that the connections are secure and free of defects.
-
Follow Manufacturer’s Instructions: Always refer to the manufacturer’s guidelines and instructions for proper connector installation techniques specific to your heating cable.
By following these step-by-step instructions for cable preparation and connector installation, you can ensure a safe and reliable connection for your heating cable system. Remember to exercise caution and attention to detail throughout the process to avoid any issues or hazards.
Testing and Troubleshooting
Conducting Continuity Checks
Conducting continuity checks is a critical step in ensuring the proper functioning of your heating cable system. Here’s how to do it:
-
Prepare Your Multimeter: Set your multimeter to the continuity or resistance setting, depending on the model. Ensure that the probes are connected securely and that the multimeter is functioning correctly.
-
Isolate the Cable: Disconnect the heating cable from the power source to ensure your safety during the testing process.
-
Test the Cable: Place one probe of the multimeter on one end of the heating cable and the other probe on the opposite end. If the cable is continuous and properly connected, the multimeter should display a reading close to zero ohms.
-
Check for Breaks: Move the probes along the length of the cable, paying close attention to any significant changes in resistance. If the multimeter displays a reading significantly higher than zero ohms, it indicates a break or discontinuity in the cable.
-
Inspect Connectors: Focus on the connectors and terminations of the heating cable. Ensure that they are securely attached and free from damage or corrosion, as these can cause interruptions in continuity.
-
Repeat the Process: If you detect any issues during the continuity check, repeat the process to verify the results and pinpoint the location of the problem.
Identifying and Resolving Common Connection Issues
Despite careful installation, heating cable systems may encounter common connection issues that require troubleshooting. Here’s how to identify and resolve them:
-
Insufficient Heat Output: If the heating cable fails to generate sufficient heat, it may indicate a poor connection or inadequate power supply. Check the connections for tightness and ensure that the power source meets the system’s requirements.
-
Intermittent Heating: Intermittent heating can be caused by loose or corroded connections, temperature sensor malfunctions, or thermostat issues. Inspect and clean the connectors, replace any faulty components, and recalibrate the thermostat if necessary.
-
Uneven Heating: Uneven heating along the length of the cable may be due to improper installation or cable damage. Check for kinks, twists, or damage to the cable, and ensure that it is installed evenly and securely.
-
Tripped Circuit Breakers or Fuses: If the heating cable repeatedly trips circuit breakers or blows fuses, it may be drawing too much current due to a short circuit or overload. Inspect the cable and connectors for signs of damage or overheating, and address any issues promptly.
-
Faulty Thermostat: A malfunctioning thermostat can cause temperature fluctuations or failure to maintain the desired temperature. Test the thermostat for proper operation, replace it if necessary, and recalibrate as needed.
By conducting continuity checks and addressing common connection issues, you can ensure the reliable and efficient operation of your heating cable system. Regular maintenance and troubleshooting are key to preventing potential problems and maximizing the lifespan of your heating system.
Best Practices for Maintenance and Longevity
Proper Insulation and Protection Measures
Proper insulation and protection measures are essential for maintaining the integrity and longevity of your heating cable system. Here are some best practices to ensure optimal performance:
-
Use Insulation Materials: Install insulation materials such as foam pipe insulation or heat-resistant tape to protect the heating cable from external elements and physical damage. Insulation helps maintain consistent heat distribution and prevents heat loss, improving energy efficiency.
-
Secure Cable Route: Ensure that the heating cable is installed in a secure route away from potential hazards such as sharp edges, corrosive chemicals, or heavy machinery. Use cable clamps, brackets, or adhesive clips to secure the cable in place and prevent strain on the connections.
-
Weatherproof Connections: Use weatherproof enclosures or junction boxes to protect the cable connections from moisture, rain, and extreme weather conditions. Properly sealed connections prevent water ingress, corrosion, and electrical hazards.
-
Inspect Regularly: Conduct regular visual inspections of the heating cable system to check for signs of damage, wear, or deterioration. Look for frayed cables, loose connections, or damaged insulation, and address any issues promptly to prevent further damage.
-
Maintain Clearances: Ensure adequate clearance around the heating cable system to allow for proper airflow and ventilation. Avoid covering the cable with insulation or other materials that could obstruct heat dissipation and lead to overheating.
Scheduled Inspection and Maintenance Tasks
Scheduled inspection and maintenance tasks are crucial for identifying potential issues early and prolonging the lifespan of your heating cable system. Here’s a checklist of tasks to include in your maintenance routine:
-
Regular Visual Inspections: Inspect the heating cable system at least once a year for signs of wear, damage, or deterioration. Look for discoloration, corrosion, or physical damage to the cable and connections.
-
Check Thermostat Settings: Verify the thermostat settings and operation to ensure that the heating cable is functioning correctly and maintaining the desired temperature. Calibrate the thermostat if necessary to optimize energy efficiency.
-
Test Continuity: Conduct continuity checks periodically to verify the integrity of the cable connections and ensure proper electrical conductivity. Use a multimeter to test for continuity and address any issues promptly.
-
Clean Surrounding Area: Keep the area around the heating cable system clean and free of debris, snow, or ice buildup. Clear away any vegetation, dirt, or other obstructions that could impede heat transfer or cause damage to the cable.
-
Record Maintenance Activities: Keep detailed records of all maintenance activities, including inspection dates, findings, and any repairs or replacements performed. This information helps track the condition of the heating cable system over time and facilitates future maintenance planning.
By following these best practices for insulation, protection, and scheduled maintenance, you can prolong the lifespan of your heating cable system and ensure reliable performance for years to come. Remember to prioritize safety and attention to detail in all maintenance activities to avoid potential issues and maximize efficiency.
Regulatory Compliance and Certification
Understanding Local Building Codes and Regulations
Understanding local building codes and regulations is crucial when installing heating cable systems to ensure compliance with safety standards and legal requirements. Here’s why it’s essential:
-
Safety Compliance: Local building codes often include regulations related to electrical installations, fire safety, and energy efficiency. By understanding these codes, you can ensure that your heating cable system meets safety standards and protects against hazards such as electrical shocks and fire hazards.
-
Legal Requirements: Failure to comply with local building codes and regulations can result in fines, penalties, or even legal action. It’s essential to familiarize yourself with the specific requirements in your area to avoid potential consequences and ensure the legality of your installation.
-
Insurance and Liability: Compliance with building codes may also impact your insurance coverage and liability in the event of property damage or personal injury. Insurers may require proof of compliance with regulations to process claims or provide coverage for heating cable systems.
-
Environmental Considerations: Building codes may include provisions related to environmental impact, such as energy efficiency standards or restrictions on certain materials. Understanding these regulations can help minimize the environmental footprint of your heating cable installation and ensure sustainable practices.
To ensure compliance with local building codes and regulations, consult with a qualified electrician or building inspector familiar with the requirements in your area. They can provide guidance on specific code requirements and help ensure that your heating cable system meets all necessary standards.
Importance of Certified Installation and Compliance Documentation
Certified installation and compliance documentation play a vital role in demonstrating the safety and reliability of your heating cable system. Here’s why it’s important:
-
Verification of Compliance: Certified installation documentation serves as proof that your heating cable system has been installed in accordance with manufacturer specifications and industry standards. This documentation may include installation manuals, test reports, and compliance certificates.
-
Warranty Coverage: Many manufacturers require certified installation by a qualified electrician to validate warranty coverage for heating cable systems. Failure to comply with installation requirements may void the warranty and leave you responsible for repair or replacement costs.
-
Building Permit Requirements: Some jurisdictions may require a building permit for the installation of heating cable systems, especially for new construction or major renovations. Certified installation documentation may be required as part of the permit application process to verify compliance with building codes and regulations.
-
Resale Value: Having certified installation and compliance documentation can enhance the resale value of your property by providing assurance to potential buyers that the heating cable system is safe, reliable, and compliant with regulatory standards.
To ensure that your heating cable system is installed and documented properly, consider hiring a licensed electrician with experience in heating cable installations. They can ensure compliance with local regulations, provide certified installation documentation, and help protect your investment in the long term.

